
Best Vegan Cheddar Cheese Recipe (Shreddable, Meltable & 50% Cheaper Than Store-Bought)
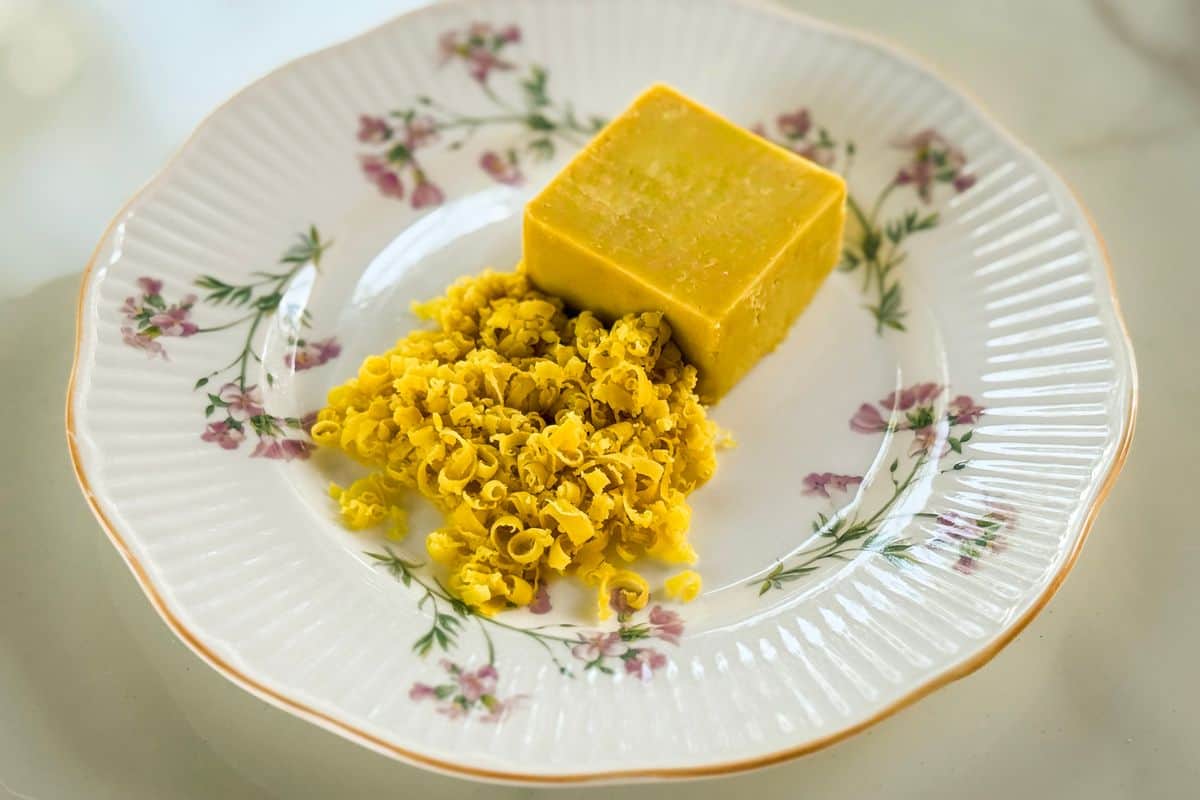
If you've spent any time in the world of vegan cheese making, you already know the frustration. You find a recipe that looks promising, spend time and money on ingredients, follow every step carefully — and end up with something that either tastes nothing like cheddar, refuses to firm up in the fridge, or breaks into an oily, grainy mess before it even makes it into the mold. We've been there more times than we'd like to admit. After testing countless vegan cheddar recipes over the years and experiencing every one of those disappointments firsthand, we finally cracked the code — and this is the result.
This is the most foolproof, reliable, genuinely delicious vegan cheddar cheese recipe we've ever come across — and we say that with complete confidence because we developed it specifically to solve every problem that makes other vegan cheddar recipes fail. It shreddable. It's meltable. It firms up perfectly every single time. And most importantly — it actually tastes like cheddar.
Why Most Vegan Cheddar Recipes Fail — And Why This One Doesn't
The three most common failure points in vegan cheese making are a broken emulsion, a cheese that never properly firms up, and a final product that simply doesn't taste good enough to bother with. This recipe was engineered from the ground up to eliminate all three of those problems entirely. The emulsion holds reliably every time, the cheese firms up beautifully after 12 to 24 hours in the refrigerator, and the flavor is genuinely sharp, savory, and satisfying in that distinctly cheddar way that makes you want to keep reaching for more. No disappointments, no disasters, no wasted ingredients. Just a great cheese, every single time you make it.
Equipment — What You Need and What You Can Substitute
This recipe uses a steaming method to set the cheese, which is what gives it that consistent, reliable firmness that so many other recipes struggle to achieve. You have two options for the cooking method — a stovetop steamer with a steamer basket, or an Instant Pot with a trivet. Both work beautifully, so use whichever you have available.
Don't have a trivet for your Instant Pot? Simply fashion a small platform out of aluminum foil — it works perfectly. No steamer basket? A colander or even a metal strainer works just as well, as long as your mold fits inside it comfortably. This recipe is designed to be accessible regardless of what equipment you have on hand.
For the mold, we strongly recommend using a silicone cheese mold — or any silicone mold that fits inside your cooking container. The reason silicone is so important here is that this cheese firms up exceptionally well, which is one of its greatest qualities, but it also means that removing it from a rigid metal mold can be genuinely difficult and frustrating. Silicone flexes, releases cleanly, and makes unmolding a completely stress-free experience. We've tried metal molds with this recipe and don't recommend it — consider yourself warned!
How to Store It
Once your cheese is made, transfer it to the refrigerator and allow it to firm up for 12 to 24 hours before slicing, shredding, or using. After that it keeps beautifully in an airtight container in the refrigerator for up to two weeks, and in the freezer for up to six months. If you choose to freeze it, thaw it slowly in the refrigerator before use — and whatever you do, don't try to speed up the process in the microwave, unless you want a puddle of melted cheese instead of a block. The slow fridge thaw preserves the texture perfectly.
The Nutrition Story
Let's talk about what's actually in this cheese, because the nutritional profile is genuinely impressive for a vegan cheese — especially compared to both dairy cheddar and most store-bought vegan alternatives.
On a per tablespoon basis, this cheese delivers a similar fat and protein content to traditional dairy cheddar — so you're not sacrificing anything in terms of richness or satisfaction. But where this recipe pulls ahead nutritionally is in the details. Unlike dairy cheese which contains virtually no omega-3 fatty acids and only a small amount of omega-6, this recipe contains a meaningful amount of both omega-3 and omega-6 fats — the healthy, anti-inflammatory fats your body actually needs. It's also significantly richer in B vitamins and folate than traditional dairy cheddar, thanks to the nutritional yeast at its core. Like all cheese it's best enjoyed in moderation, but you can feel genuinely good about the fact that every serving is delivering more nutritional value than its dairy equivalent.
30 to 50% Cheaper Than Store-Bought Vegan Cheese
Now for the part that might surprise you most — the cost. Store-bought vegan cheddar is notoriously expensive. Most brands charge $5 to $6 for an 8oz equivalent, and even on sale you're rarely looking at less than $4. This homemade recipe costs less than $3 for 8oz — and that's using store-bought vegan sour cream or yogurt as an ingredient. If you make our homemade vegan sour cream or yogurt recipes instead — which we highly recommend because they're incredibly easy, cheap, and delicious — that cost drops even further.
When you factor in the taste, the texture, the nutrition, and the price, the math is pretty simple. This homemade vegan cheddar beats store-bought in every single category. Better flavor, better texture, better nutrition, and significantly better value. Once you make it, we don't think you'll ever go back to buying vegan cheese from the store again.
Best Vegan Cheddar Cheese Recipe (Shreddable, Meltable & 50% Cheaper Than Store-Bought)
This is the most foolproof homemade vegan cheddar cheese recipe you'll ever make — shreddable, meltable, and firms up perfectly every single time. Made with simple ingredients for less than $3 per 8oz, it's 30 to 50% cheaper than store-bought vegan cheese and tastes better too. Rich in B vitamins, folate, and omega-3 fats, with a similar protein and fat content to dairy cheddar. Use a stovetop steamer or Instant Pot and a silicone mold for perfect results every time.
- Prep
- 15 min
- Cook
- 15 min
- Cool
- 12 hr
- Total
- 12 hr 30 min
- Servings
- 38 (1 tablespoon each)
- Difficulty
- Easy
Ingredients
Dry Ingredients
Wet Ingredients
Instructions
Take out a silicon cheese mold that will fit in a pot on the stove then in a pot with a steamer basket attached (you can also use a colander or mesh strainer that fits in the pot, if you don't have a steamer basket - see notes), fill the bottom with water and bring it to a boil.
In a mixing bowl combine your dry ingredients together including 1/4 cup Tapioca Flour/Starch, 1/2 cup Corn or Potato Starch, 1/2 cup Nutritional Yeast, 1/4 tsp Garlic Powder, 1/2 tsp Onion Powder, {Mustard Powder}, 1/4+ tsp Ground Turmeric and 1+ tsp Salt.
Melt 1/4 cup Refined Coconut Oil in the microwave until it's just melted, then add 1 cup Vegan Sour Cream (see notes for substitutions) and 1 tbsp White Miso Paste. Mix well, until all the lumps are removed.
Slowly pour your wet mixture into your dry mixture, the slower you pour & mix to incorporate well, the less lumps there will be. For a super smooth consistency you can blend in a food processor or blender also, but we just like mixing by hand to spare ourselves from washing more dishes.
Pour your mixture into your silicon cheese mold, you can use a metal mold if that's all you have but it might be difficult to remove the cheese from it once it hardens.
Place your mold in your steamer basket when your water is boiling, Cover with a lid and steam for 30 minutes.
Let your molds cool, then transfer either place the molds lid on top of them or cover with plastic wrap, then transfer to the refrigerator. Let cool in the refrigerator for at least 12 hours, we would recommend 24 hours if you're patient enough!
Nutrition (per serving)
- Calories
- 39 kcal
- Protein
- 1.51 g
- Carbs
- 3.31 g
- Fat
- 2.13 g
- Fiber
- 0.37 g
- Sugar
- 0.47 g
- Sodium
- 81.72 mg
- Vit. B12
- 1.75 mcg
Notes & Tips
- We recommend using Vegan Sour Cream for this recipe because it gives the cheese that tangy lactic kick that cheese lovers just love. If you don't have sour cream you can substitute with yogurt or plant milk plus one tablespoon of an acid of your choice such as apple cider vinegar, lemon juice, white vinegar, etc.
- We recommend using Refined Coconut Oil for this recipe, while you can use unrefined (or virgin) coconut oil, it will make your cheese have a subtle coconut flavor, which is a little bit weird in a savory recipe.
- We highly recommend using a silicon mold for this recipe, it doesn't even need to be a cheese mold, as long as it fits in your cooking vessel. We used a silicon ice cube mold, which worked fine. If you only have a metal mold, you can use that... it just might be difficult to remove once the cheese hardens (it gets very very firm).
You may also like
Reviews
No reviews yet. Be the first to share your experience!